Sunday 19 January 2014

Patchiqué Blocks 26 and 77

http://www.flickr.com/groups/2445878@N22/pool/with/11776958006/#photo_11776958006
This week threw up a lovely surprise on the Patchiqué journey – Block 26 ‘Ichimatsu yotsu me’ (translated as four checked squares). 
Block 26 from Japanese Taupe Quilts
A lovely little block that was relatively easy to put together and looks quite stunning.  It is another favourite.  I followed the cutting sizes, used a scant ¼” seam and the block turned out to be a perfect 9½”.  Quick and easy. 

http://www.flickr.com/groups/2445878@N22/pool/with/11776958006/#photo_11776958006
Patchiqué Block 26 - Patchsmith Style
Susan has marked this block as medium difficulty in the book and I guess I would agree with that, especially if you are using a directional print.  I really enjoyed making this block and it came as a refreshing change after all those little, fiddly blocks I’m making for the Quilty Fun sew-along.
 
Block 77 ‘Ken yotsu me’ (four sword squares) was another easy applique block. 
Block 77 from Japanese Taupe Quilts
But note, if you are using the fusible appliqué method you will need to cut the B squares ½” smaller than stated in the book as the book details the needle-turn appliqué method whereby you turn under ¼” all the way around the block.  So cut your B squares 1¾” square rather than 2¼” if using fusible webbing as I have. 
http://www.flickr.com/groups/2445878@N22/pool/with/11776958006/#photo_11776958006
Patchiqué Block 77 - Patchsmith Style

So there you have it – a relatively easy week on the Patchiqué trail with one morning’s work turning out two wonderful additions to my Patchiqué quilt.

Susie, from Susie's Sunroom has been following along and has posted all her blocks on Flickr.  Look at this lovely collection.  I love the colours she has used.
http://www.flickr.com/groups/2445878@N22/pool/with/11776958006/#photo_11776958006

Next fortnight I shall be attempting Block 24 patchwork and Block 69 for the appliqué block so be sure to check back to see how I get on.
 
https://www.facebook.com/groups/quilting.gallery.swaps/
And don’t forget, the Quilting Gallery/Patchsmith Mug Rug Swap registration closes on Tuesday.  If you haven’t joined yet there is still time (just leave a message of the Facebook page as the Quilting Gallery website is undergoing some maintenance).  You will also find an extra page in the Mug Rug Basics tab detailing how to add small details to your mug rugs. 

But don't worry if you don't get a chance to join in - I will be adding the two patterns to my shop at the end of the week so you can still make up the designs.

Sew until next time .....

Friday 10 January 2014

Winter Dove and Russian Doll Mug Rugs

I created two patterns to celebrate the Sochi Winter Olympics of 2014.  Firstly the Winter Dove mug rug pattern - a bird of peace and unity .....
Winter Dove Mug Rug
and secondly the Russian Doll pattern to celebrate traditional Russian crafts. 
Russian Doll Mug Rug
Both patterns are suitable for beginner and experienced sewists alike and I thought I might give some hints and tips to make them even easier.  But before I do a reminder to print the patterns to ‘exact size’.  There is a print-check-box on each applique sheet to make it easy for you to check your print out and you will find details of how to download and print here.

So let’s make a start - there is much to talk about .....
Fabric choices.  The fabrics that you choose will have the most influence on how your mug rugs turn out and the choice of fabric will determine whether the finished mug rug is ‘modern’ or ‘traditional’ or ‘country’.  Play around with your choices – lay the fabrics together, turn away and then look back at them.  Do they work? Do they contrast with the background?  Most importantly – do you like them?  I know, I know, you are giving these mug rugs away but I would urge you to make something you like because, in so doing, you are sharing your tastes and choices with another - you are giving away a glimpse of who you are – connecting with another over fabric, fun and friendship.
For the Winter Dove mug rugs I used a plain white fabric for the bird .......
and a two-tone white from Kate Spain’s ‘In From the Cold’ range ....... 
Whenever it comes to using a plain white I tend to use a thicker white cotton than normal quilting cotton to avoid the background showing through.  In fact I use fabric cut from a plain white tablecloth especially for this purpose – it is 100% cotton and I know it will wash well.  But do not worry if you only have quilter’s cotton and you think the background may show through – you can fuse two pieces together using fusible webbing and treat it as one piece.   This technique works well - I have used it many times.   Another option is to use felt.
http://www.craftsy.com/pattern/quilting/home-decor/ghostly-duo-mug-rug/59473
This Ghostly Duo are created from two layers of fused white fabric
ensuring the dark background doesn't show through.
For the red Russian Doll I used a selection of fabrics from a Moda ‘Red Robin’ charm pack but there is no need to buy fabric specifically for this swap – use something you already have in your stash or scrap box. 
And let us not forget the sewing cotton as this can have a big impact.  It doesn’t have to complement the fabric. 
Complementary quilting detail
It can also contrast.  So if you do not have lots of different coloured cottons you could use just one colour of thread to stitch the leaves and add detail to the Winter Dove mug rug.  Choose a colour that will outline and highlight.  And don’t rule out black thread – a picture or drawing edged in black becomes more defined and striking – this can be true with fabric as shown in my Thanksgiving Wreath mug rug pattern. 
Thanksgiving Wreath Mug Rug (from my Special Days pattern book)
The leaf detail is created using black sewing thread.
You do not need to add any additional stitching if you prefer a simpler look.  The Russian Doll looks just as good with a fussy-cut tummy panel as she does with a heart emblem. 
And whilst we are looking at the Russian Doll pattern we should discuss ‘eyes and smiles’.  It is amazing the difference a few stitches can make on a finished mug rug.  Yet when it comes to adding those details people tend to get a little nervous.  There is no need – I have a simple way to do both the eyes and the smiles using two strands of embroidery floss.  
http://www.pinterest.com/pin/568860996653985028/
Simple stitching brings a smile to my face.

For the eyes use five straight stitches, close to each other.  Try to make them all the same size.  There is no need to attempt to make the eyes appear rounded – they will look just fine.  As for the mouth – yet again use small, even, straight stitches.  I used four on the Russian Dolls but five would also work.  I used a running stitch with a small gap between each but use whatever stitch you are comfortable with.

If you are really unconfident with your stitching the beauty of the Russian Doll pattern is that the hair and face slip under the cloak so you can add the facial detailing to the fabric circle before fusing it in place.  Once you are happy with your stitching you can slip the face  under the cut-out circle of the cloak and position the hair in place.  From there it is just a matter of stitching around the cloak cut-out (as shown in the Russian Doll photo above) and both the hair and the face will be secure.  I also stitched along the edge of the hair as well. 
Permanent black marker (thin) was used to create this smile.
Of course you could always use a thin, permanent fabric marker and draw the face onto the fabric.  I did this with my Gingerbread mug rug and it worked perfectly.  Remember to test the marker on a scrap of the fabric before use and I would strongly urge you to draw the face prior to stitching it in position – just in case your hand slips or you make a mistake!
http://www.pinterest.com/pin/568860996653985047/
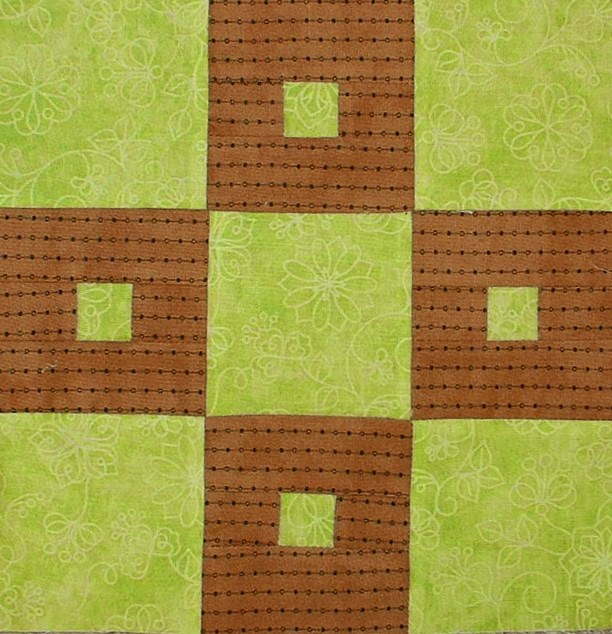
Simple Patched Sidebar - no matching of seams here!
So finally let us talk patchwork.  Not everybody likes matching points and seams so the Russian Doll pattern comes with a simpler patchwork option – stripes of fabric.  But a mug rug is the perfect project on which to hone your skills so if you like patchwork I would recommend you make the patched version and do not worry if your seams do not match exactly.  It will add to the handmade, rustic charm of your mug rug and, as any Patchsmith will tell you, perfection is so over-rated.  Look at the banners for the Sochi Olympics and you will see that there isn’t a matched seam in sight. 

Remember - these are your mug rugs that you are giving – my pattern is just a template – play with stitches, colour and pattern, try different techniques but more than anything else, enjoy yourself.  Join in, have fun, make friends and share a little of who you are with another.

Sew until next time ....................

p.s. I will post this page in the ‘Mug Rug Basics’ section of this blog where you will find lots more hints and tips on quick fuse applique, binding and mug-rug-swap etiquette - just click on the link or the tab above. 

Sunday 5 January 2014

A Happy New Patchiqué Year - Blocks 15 and 75

With twelve blocks made already we start the New Year with two more blocks - one patched and one appliquéd.  Firstly the patched Block 15 – ‘Kasuri nijū kaku’ (translated as Kasuri double square).
Block 15 from Japanese Taupe Quilts
I followed the instructions in the block exactly – no Patchsmith shortcuts this week as none were needed.    This block is rated as a medium difficulty in the book which I am guessing is due to the matching of the corners but I found it went together really well with no need for the seam ripper. 
http://www.flickr.com/photos/79143602@N04/11776958006/in/photostream/
Block 15 - Patchiqué Style
And although this block looks quite ordinary - once made it will become a firm favourite.  It would be the perfect block to repeat throughout a bed quilt, alternating it with a plain square or applique panel.  It would also be an ideal block for new patchers due to the limited number of matched seams. 

So onto this week's appliqué block – Block 75 – ‘Hoya no hana’ (Hoya flower). 
Block 75 from Japanese Taupe Quilts
Again this is rated medium difficulty because Susan Briscoe (the author of Japanese Taupe Quilts) is a saint and hand-turned all her appliqué.  I, on the other hand, would rate this block as easy if using quick-fuse appliqué.
http://www.flickr.com/photos/79143602@N04/11776185875/
Block 75 - Patchiqué Style
I have been machine-stitching the appliqué blocks to date but this week I found myself with an opportunity to add a little hand stitching to this block - not as much as in the book but a nice touch nonetheless.  Saturday morning found me sitting with my father whilst my mother went shopping (my father has dementia and cannot be left alone).  With a couple of hours away from my busy life, I pulled out Block 75 and added a few lines of running stitch to each petal.  That simple act has created a happy memory – sat in the warm stitching away whilst my father watched a program about spitfires in the war.  The program reminded my Dad how, in his childhood, he would watch the spitfires fighting in the skies above his home - a memory he was able to share with me. 

Sewing Tip:  If you are intending to add some hand-stitching then I would recommend that you cut the background block to 10" instead of the normal 9.5" as the stitching may pull your block slightly smaller.  You can then trim the finished block to 9.5" square.

And talking about memories – I blogged last week about the Wishes Quilt Along in support of the ‘Make a Wish’ foundation.  The first block was released this week (click here for a link to the free download).  I am using Wallflowers fat quarter bundles – both the Poppy and the Primrose collections - by Cluck-Cluck-Sew with Kona 'snow' background. 
http://www.flickr.com/photos/79143602@N04/11754152324/in/pool-2351378@N23
Wishes Quilt-Along - Block 1 Flying Kites
Well this block brought back a memory of Christmas many years ago spent in Southampton Neurological wing as my little four-year-old son underwent brain surgery for a large tumour in the middle of his brain.  He was so in awe of Superman and wore his Superman costume all around the hospital.  Had I known about the ‘Make a Wish’ foundation then I would’ve asked them to arrange for Superman to pop in to see him.  As it was, the hospital had Father Christmas make a personal appearance two days after surgery - another happy memory.
My son underwent further surgery eleven years later when the tumour grew back
but he is coping well today with life's challenges.
So if you get the chance I would urge you all not to miss the opportunity to slow down this week – it may just be the perfect moment to create or remember some happy memories.

Sew until next time on the Patchiqué trail when we will be making Blocks 26 and 77..................

Friday 3 January 2014

New Year - New Across the Pond Project

http://www.flickr.com/photos/79143602@N04/11754748926/
A new year and a new Across-the-Pond sew-along project – the scissor keeper.  Susie has rooted out many lovely versions of scissor keepers – from owls to hearts!  In fact there are so many it is difficult to choose which to make - check them all out at Susie's Sunroom. 

But choose we must and Susie and I have chosen a very similar design.  Susie made Vicki's Fabric Creations design in stunning turquoise and white.  Lots of room there with three nice sized pocket.

http://susiessunroom.blogspot.co.uk/2014/01/happy-new-year.html
Susie's Scissor Keep
My design also has three pockets - two at the front and one at the back.  It is a FREE and easy pattern from Cotton Creations - sounds perfect for me. 
http://mycottoncreations.blogspot.com/2012/03/3-pocket-scissor-case-tutorial.html
Cottons Creations FREE Scissor Case Tutorial
I followed the tutorial exactly and my orange and jade scissor keep is the perfect size for my larger scissors, together with a chopstick (for turning out corners) and my rotary cutter. 

http://www.flickr.com/photos/79143602@N04/11754257683/in/photostream/
There is another pocket on the reverse!
But I also wanted something to take with me when I sew-on-the-go – as I often do.  So I remade the scissor case using a 7” x 8½” rectangle. 

http://www.flickr.com/photos/79143602@N04/11754748926/
My 'about-town' scissor keep. 
This version is ideal for my small scissors, pencils and ruler – all the things I need when sewing and designing around town.

I didn’t have fusible batting so I used lightweight interfacing instead.   It works just fine and the scissor case has a firmness that ensures the scissor points wont stick through. 

The flowers were easily made.  For the larger scissor keep I fused and stitched a fabric flower onto a circle of fabric and then made a yo-yo from the circle. 
This was stitched to a larger yo-yo and a button placed in the centre.  For the little scissor keep it was just as easy – I fused and stitched fabric flowers onto circles of felt before cutting out around the flowers.  These too were stitched in place with a button. 
I am thinking a scissor case would make a lovely little gift to pop in with a mug-rug when sending to a swap recipient.  It is lightweight and unique – a perfect combination for a little something extra (you can find more mug-rug-swap gift ideas here).  And if you are wondering whether there are any mug rug swaps coming up then watch this space ..... the Quilting Gallery and the Patchsmith may have some news for you very shortly.

Sew until Sunday when I will posting the next two Patchiqué blocks .......